A common theme in my life is having an idea, assuming that everyone wants the same thing and that products abound on the internet to satisfy my needs. More often than not I spend hours trying to find what I’m after and still nothing hits the mark. Sometimes I have to compromise and purchase the closest match, and other times I think, “Bugger it, I’ll make one myself.”
That is how this chicken coop came about. I had already made a chicken coop for my own chickens, but upon researching commercial products for a customer I was filled with dismay at the standard on offer. Nothing seemed to be very sturdy, or suit both the chicken owner and meet the needs of the chickens. In short, I thought I could do better.
When I was designing my own coop I spent hours pouring over ideas of what it could be like. The chicken tractor is to my mind the ideal chicken keeping solution – moving the chickens each day over a fresh patch of grass. Your lawn is mowed and fertilized, and you have lovely yellow yolks. Win win win. However to make that work you need relatively flat ground – we are blessed with exactly the opposite – small levels and rock cliffs. Unless I could attach the tractor to a helicopter it wasn’t going to work. So a static coop and run was the go. Most people I know who own chickens also have a static coop so that is what I decided to make.
After doing my research there were a list of factors that really mattered to me that I could see would really matter to the chickens.
- Security – to keep out foxes, rats and snakes. This essentially means 12mm square mesh at least 1mm thick and no other gaps larger than 12mm anywhere.
- Standing Room – A comment in a blog post really hit home, stating something like, “you will never regret building it tall enough to stand up in when you are cleaning them out.” Standing up in the coop means a big coop! However if you hate bending over to go in there to change the water, food and clean then everything is a chore rather than a pleasure.
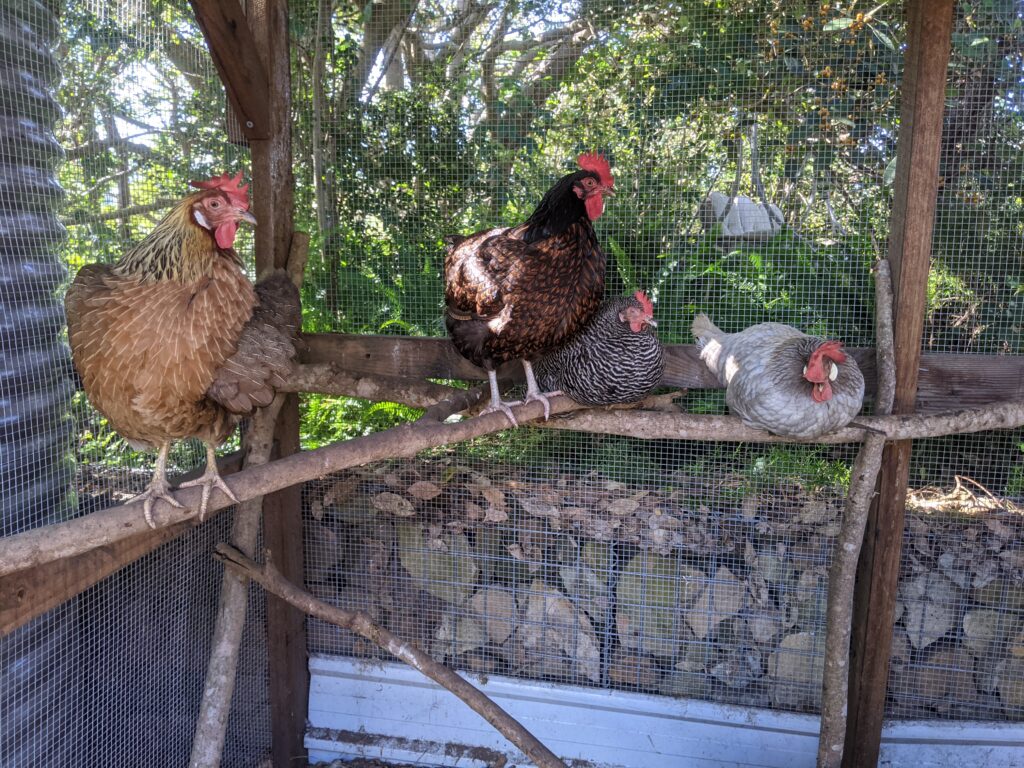
- Enough space for four chickens to spend a weekend in (if no-one is around to let them out to free range for a couple of days). At least 2 metres squared floor space.
- Deep litter system to reduce pests in the coop.
- Metal walls – trying to avoid nooks and crannies for lice and mites to hide in.
- Good cross ventilation.
- Insulated roof – to mitigate 40 degree sunny days.
In order to get the materials estimate, I made a plan and drew it in 3D in a free app called Sketchup.
I already knew I wanted to build it with a wooden frame and metal walls. Wood was the first point of call. Costs would have exploded with hardwood due to the cost of the material itself and the labour in pre drilling every single hole. The weight of hardwood is also a significant concern. Treated pine was a reluctant but necessary choice. I also knew that 70 x 35mm and 90 x 45mm timber was overkill – so I ended up buying 90 x 45 and ripping it down the middle to create 45 x 45mm framing. What I didn’t bank on was this ripping process cooking my table saw and shorting out the garage…
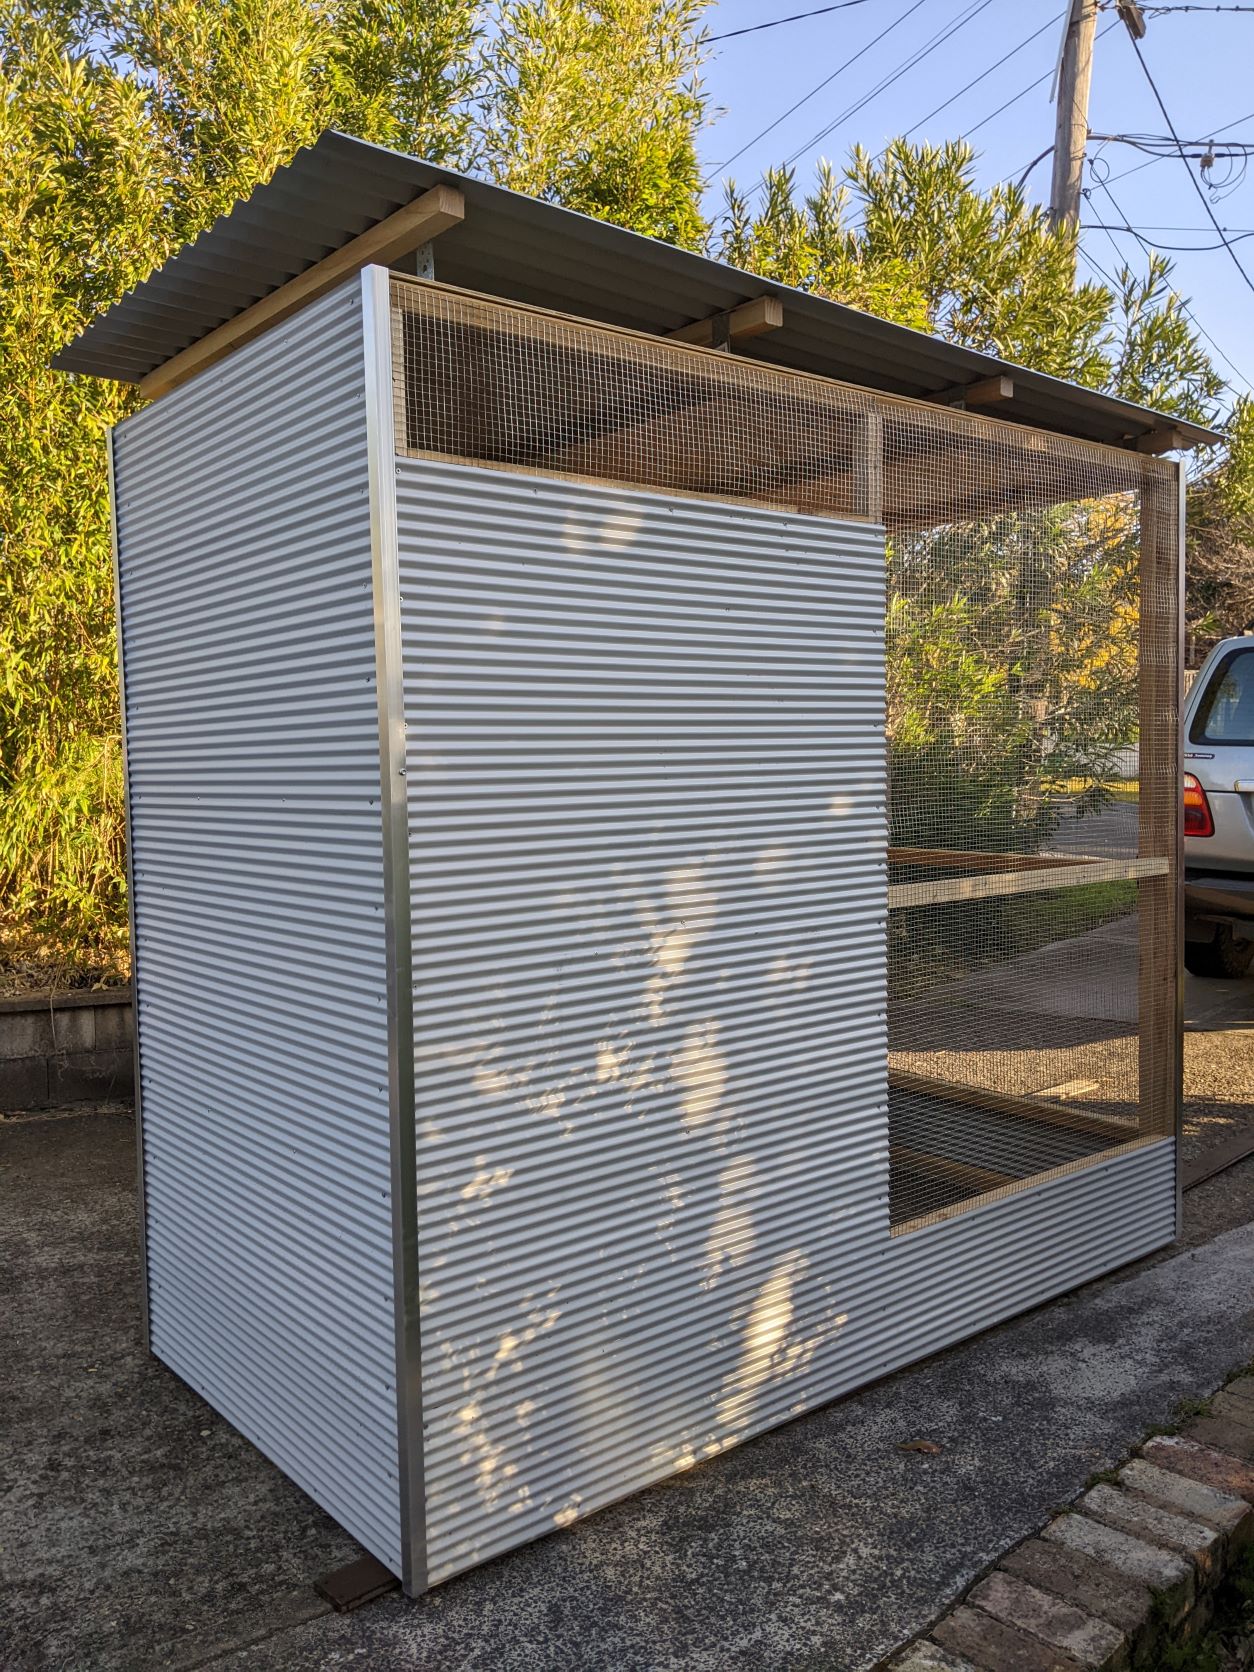
With the walls, normal Custom Orb corrugated iron profile is too large. Vermin can squeeze through the gaps and breach the chicken fortress. Mini Orb is a better choice with much smaller gaps – but it is more expensive. Custom Orb is OK for the weatherproof part of the roof.
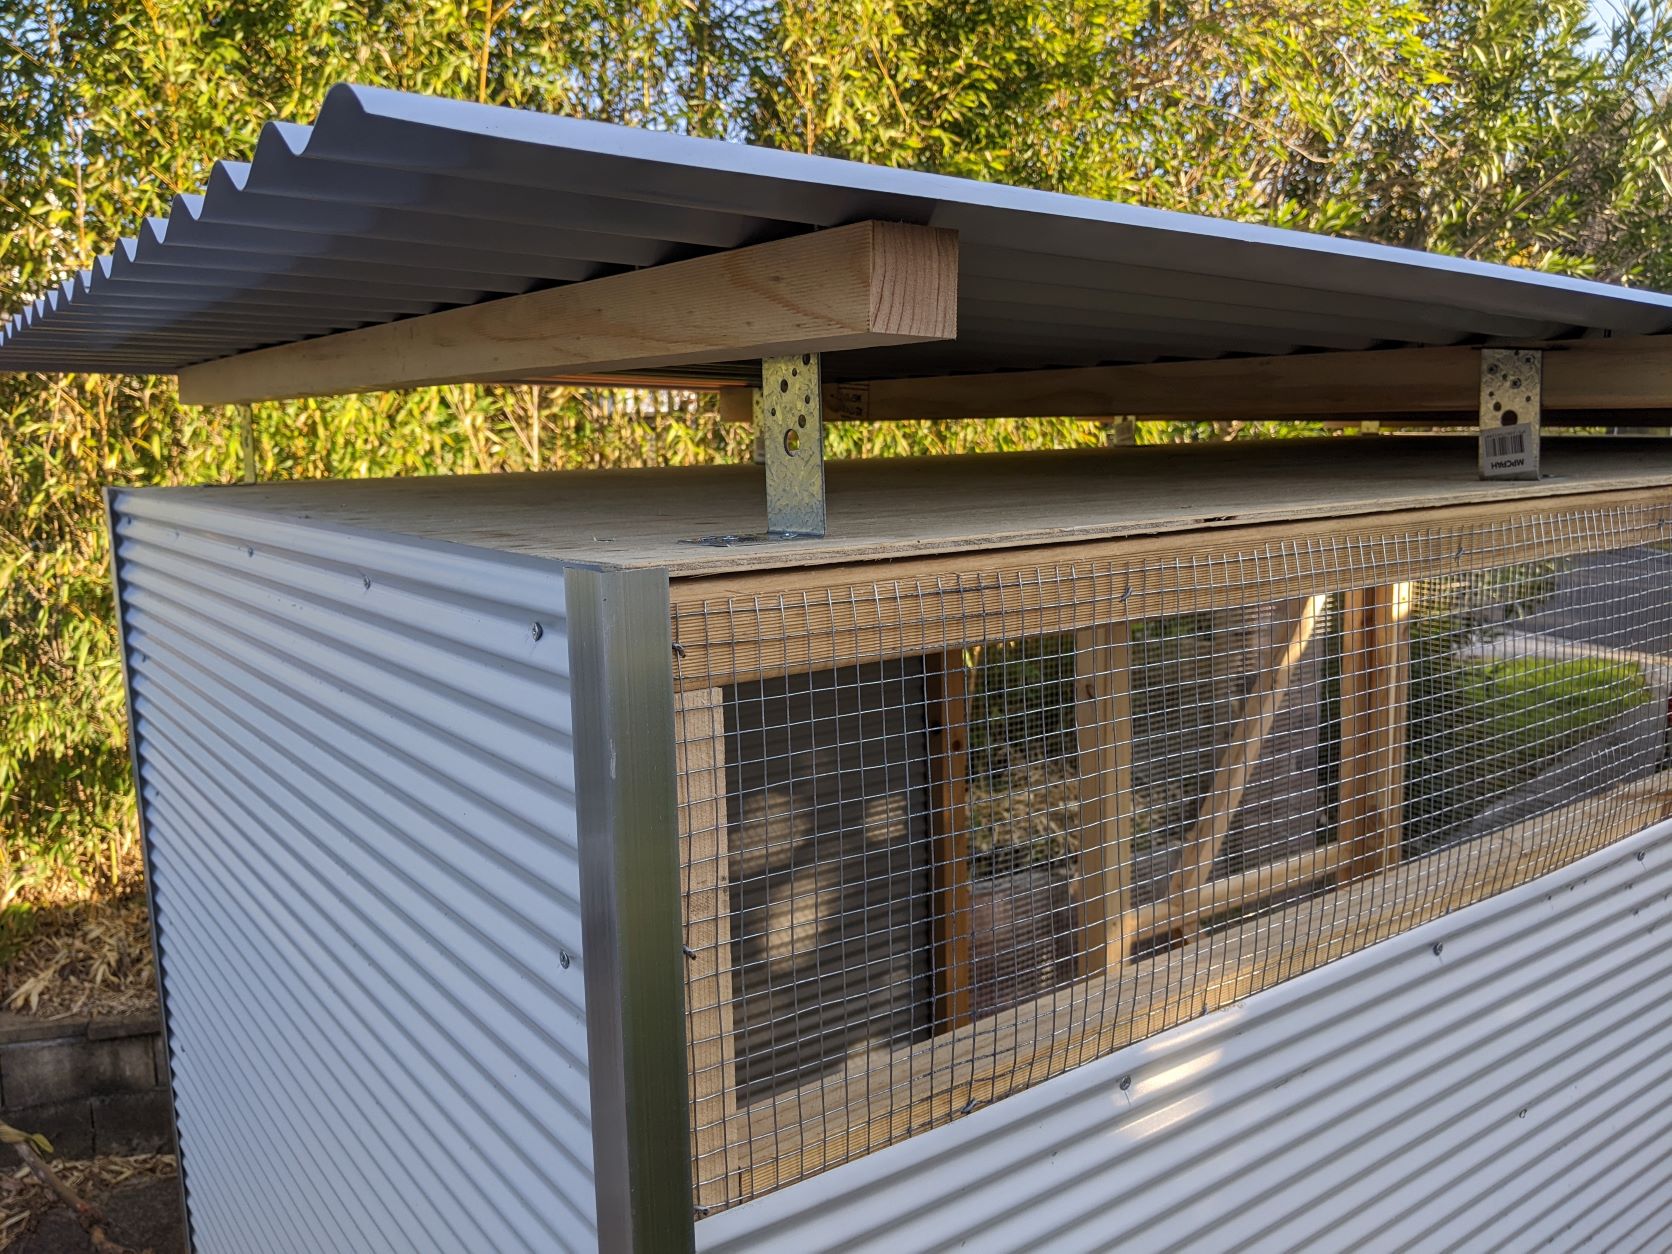
Back in the day my wife and I used to spend all our free time up at the Hawkesbury River wakeboarding and stayed at a caravan park right next to the water. I saw back then that the way people stopped the heat building up in the caravans was to erect a ‘temporary’ pergola roof (permanent structures were not allowed…) over the top so that there was an air gap between the pergola and the van. This a design feature I’ve employed numerous times since. So the roof of the main box of the coop was going to be plywood, with a suspended iron roof above. Metal brackets can be screwed to the roof to hold the roof battens above the plywood.
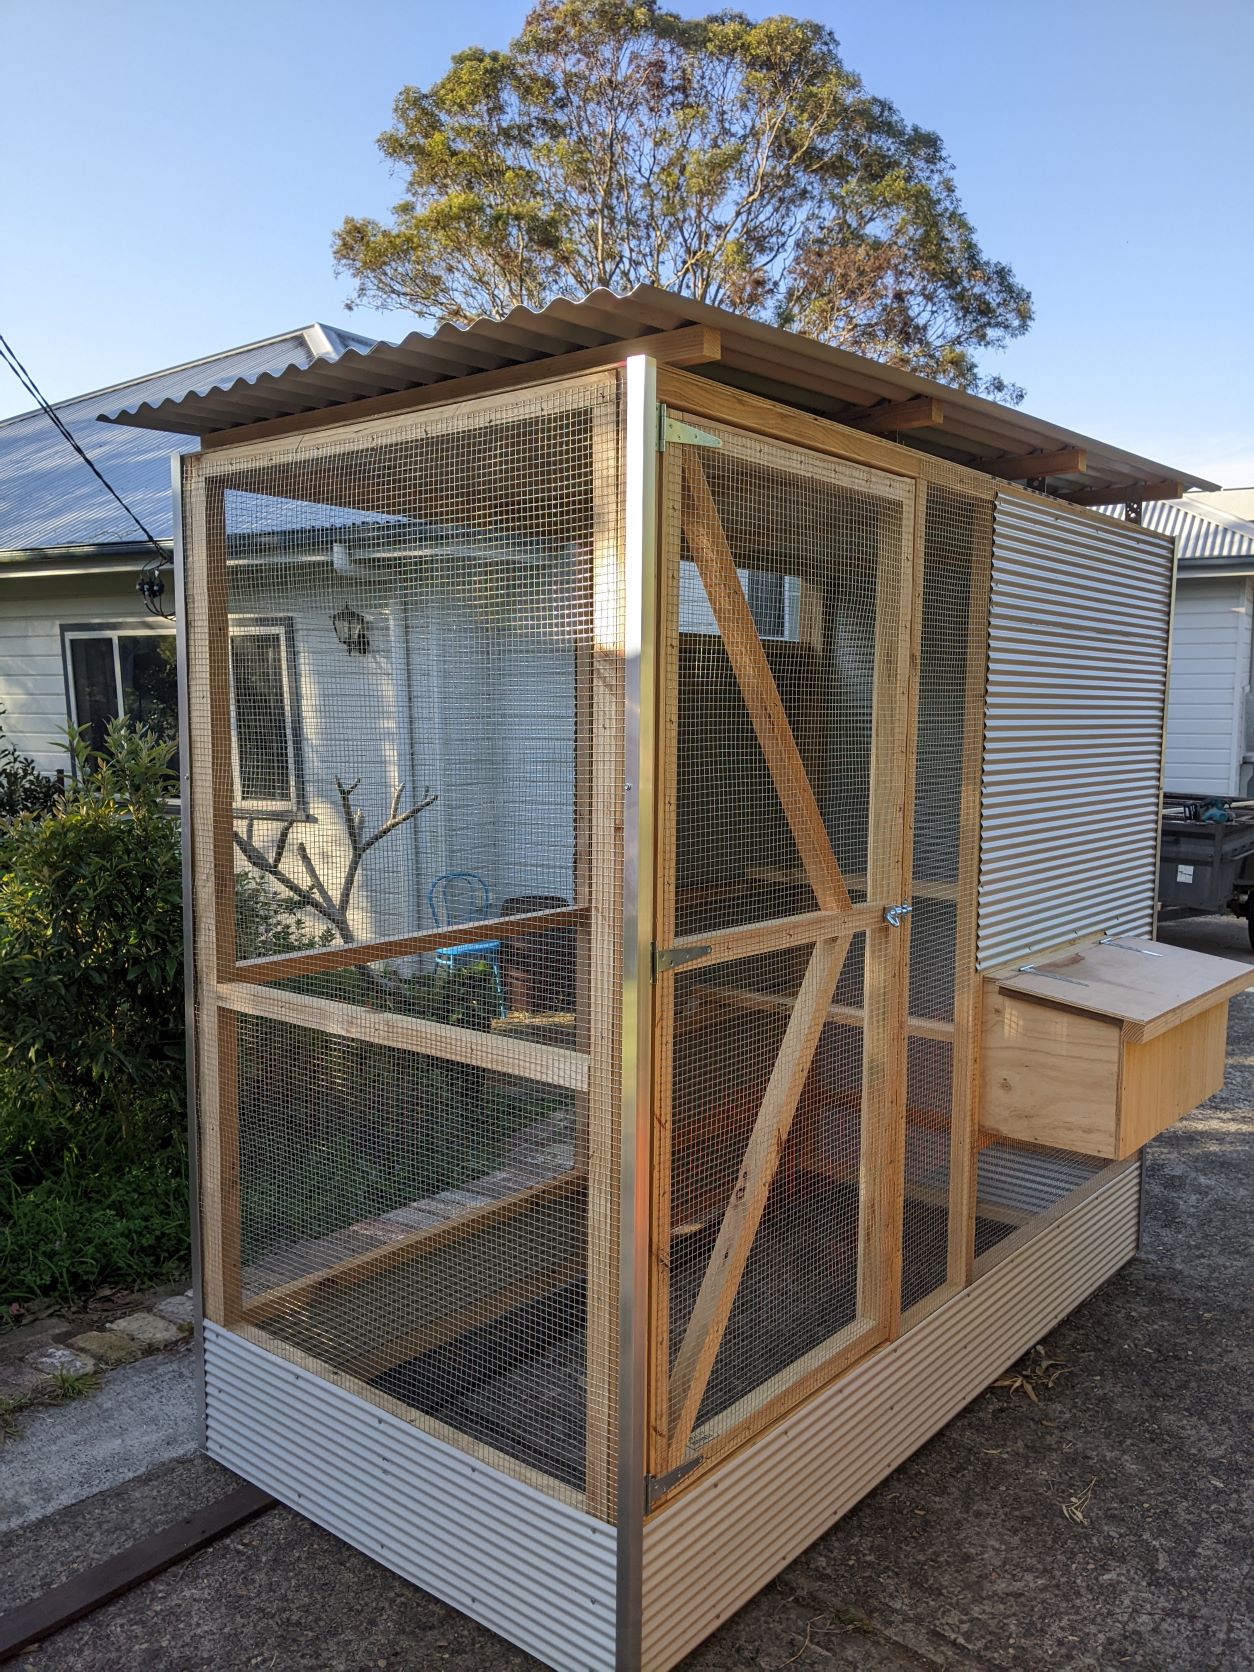
A sheet of plywood is very commonly 2.4m x 1.2m, and most timber comes in 2.4m, 3.6m and 4.8m lengths (multiples of 1.2m) so it made sense for the main box footprint to be a sheet of ply. The enclosed end of the coop is 1.2m and the open end is 1.2m so everything is in easy measurements.
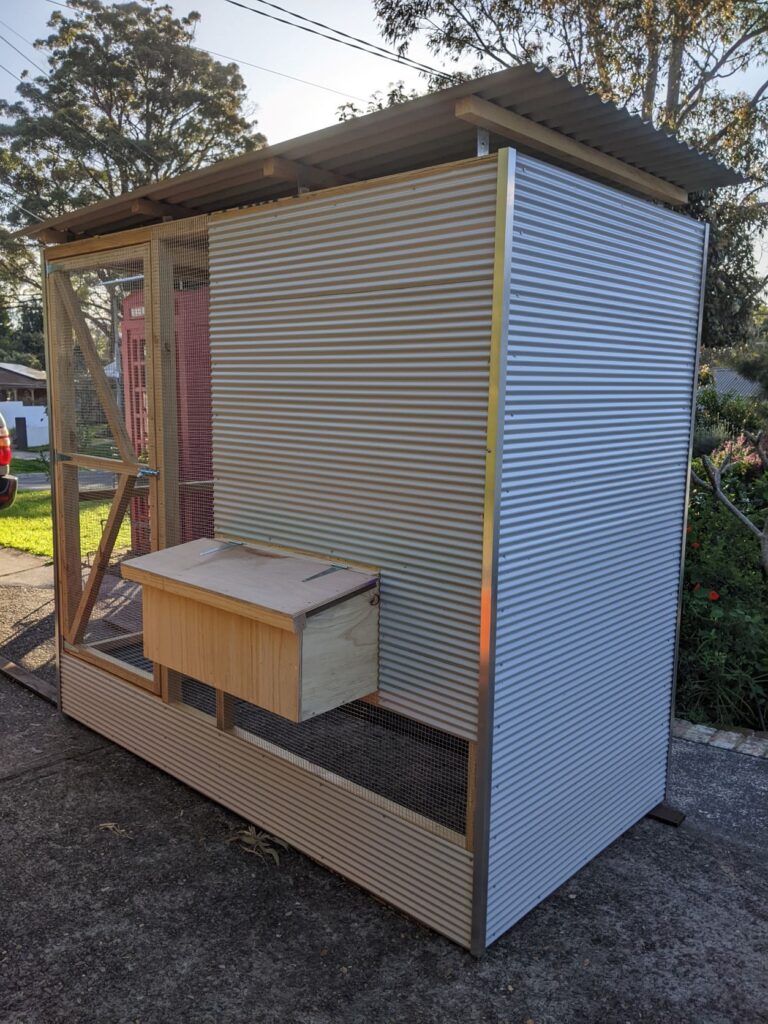
The mesh was a straightforward purchase – I just had to make sure the roll was 1.2m wide so there are no joins or overlaps needed. As I was selling this to an as yet unknown customer the corners are covered with 40 x 40mm aluminium angle to mitigate the sharp steel and mesh edges. The nesting box is simply another sheet of plywood. Done!
As this was a prototype I had to be able to construct it here at home, and then dismantle it to take it to a customer. I needed to see if everything worked out as I had planned, and also it is very heavy and too large for the trailer when built.
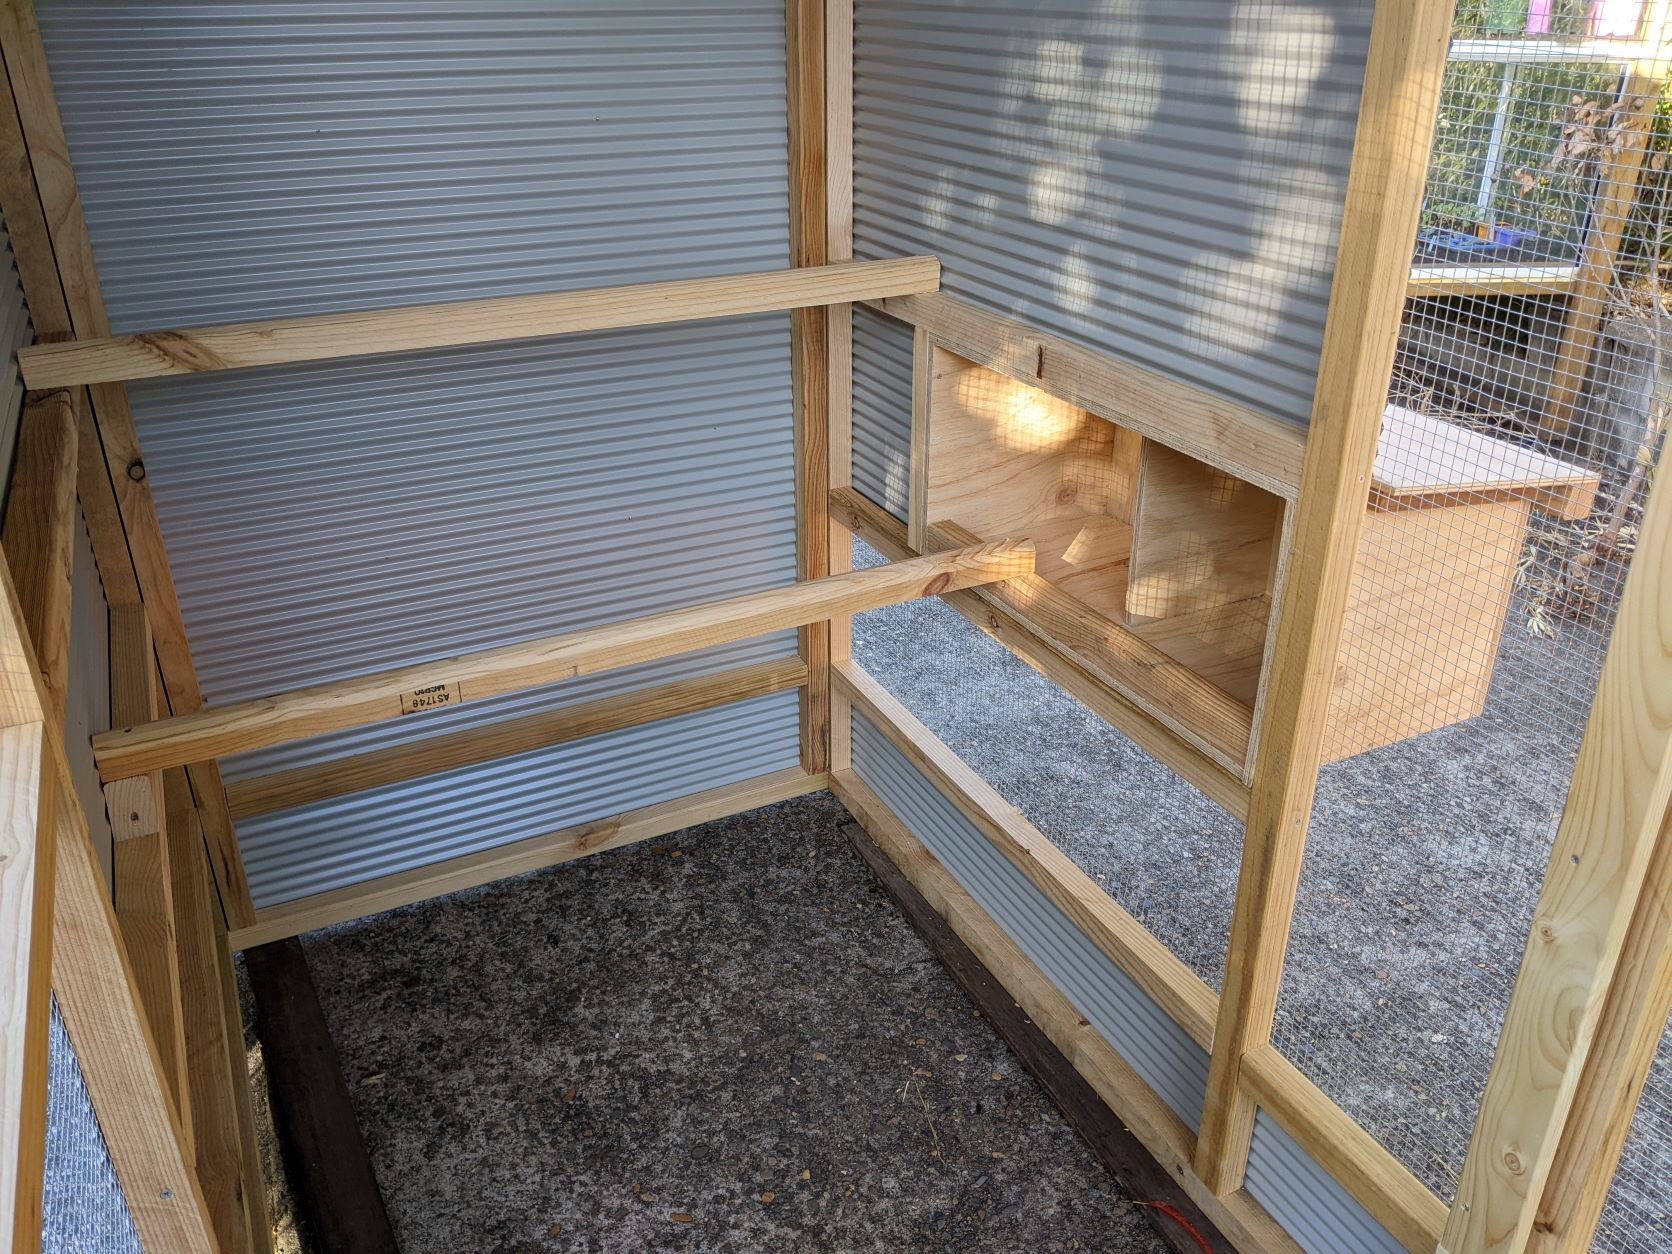
Each panel was built stand alone and then it is a matter of stitching the sides of the box together and putting the roof on. If the coop is going on pavers then the floor is already wildlife proof, but if it is going on grass, then laying a sheet of mesh on the floor and building on top is needed. Once the nesting box and perches are screwed in place, that’s it!
I am really happy with it and would definitely have it for my own coop if I needed another one! Going forward I am unsure about making another one mainly because the table saw cooking incident leaves me thinking I need different timber or shell out for a beefy saw. Using 70 x 35mm framing will be more expensive still and be very bulky. The thinking cap has to go back on!!
-
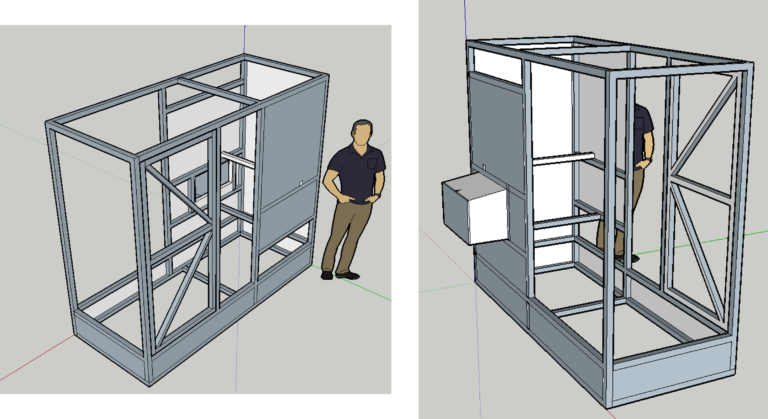
- The Plan

-

- The finished article
-
- Nesting box from outside

-

- Coop from behind
-

- Roost and nesting box
-
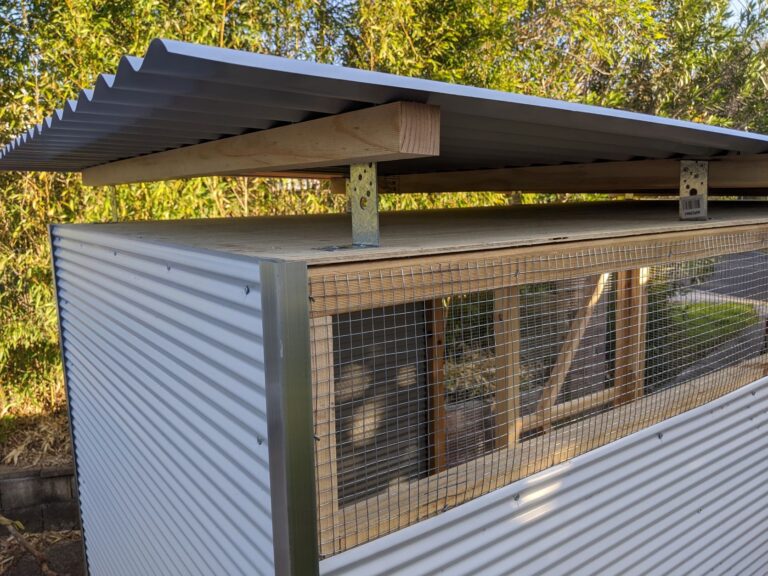
- Roof detail